Desserts are truly one of the best ideas for a picnic menu. Especially when it comes to heat. Indeed, as a rule, desserts do not melt for a long time, they do not need to be heated or frozen.
If you still think that desserts are very difficult and impractical – then this article is for you!
We will show that desserts can be transportable and easy to cook.
In fact, you will spend much less energy transporting desserts than transporting burgers, for example.
By the way, if you need to develop a menu for a festive picnic – we recommend that you look here. We have already made sure that your picnic is not only impressive but also very tasty.
We guarantee that after our recipes, desserts will become one of your favorite picnic treats for you!
What dessert can you bring to a party?
When planning your next picnic, whether that be in your backyard or at the beach — or at your favorite park, bringing the right picnic desserts is essential.
Best picnic desserts should be:
- Portable and easy to carry and pack in the picnic basket
- Does not need refrigeration
- Easily made ahead
- Super delicious
What is good picnic food?
When choosing desserts for your barbeque, pool party, or backyard get-together, keep in mind that they should be simple to serve, able to withstand heat, and really delicious.
It’s simple to prepare cookies, brownies, and bars in advance, and they travel nicely when packed.
Cakes, loaf cakes, and pies (see the section to learn whether or not pies need to be refrigerated) also store well and are easy to serve. Making the appropriate choice is crucial.
Do You Need to Refrigerate Pies?
Pies are a really enjoyable treat to bring to outdoor events like picnics and potlucks. Pies that need to be chilled and those that don’t are listed below.
Pies prepared with eggs, cream, sour cream, cream cheese, and milk, especially evaporated or condensed milk, require careful handling, according to the University of Illinois Extension. Pies made with pumpkin, cream, chiffon, or custard shouldn’t be left out of the fridge for longer than two hours.
How long can you store fruit pies at room temperature?
Fruit pies have enough sugar and acid to prevent germs from growing, according to the USDA, so they may be stored at room temperature for up to two days before being contaminated.
Pies that need refrigeration:
- Pies with dairy and egg, like cream pies
- Coconut Cream Pie
- Chocolate Mousse Pies
- Ice Cream Pies
- Any pies topped with cream
Pies that do not need refrigeration:
- Pecan pie
- Fruit pies like cherry, peach, apple, and blueberry
Well, if you were given the task of making the desserts for the summer picnic, don’t worry. You may prepare cakes, pies, cookies, cheesecakes, and a plethora of other simple dessert dishes at least four hours in advance and then chill them until the party.
Additionally, since none of these sweets are frozen, you won’t have to worry about them melting while you dine outside. (Just be careful to keep the cold foods refrigerated so they don’t into the “danger zone” for food safety.)
These easy and portable picnic dessert recipes will help you stay calm and enjoy your picnic in style.
Oatmeal Raisin Cookies
Let’s start with the simplest. Oatmeal cookies are always a good idea! Just fill a jar with cookies and take it with you on a picnic!
A great meal is guaranteed. In addition, they do not need a refrigerator or any special storage conditions at all.
AMOUNT
2 dozen 3-inch cookies
Ingredients
- 1-1/2 cups rolled oats (quick or old-fashioned, uncooked)
- 1 cup all-purpose flour
- 1/2 tsp. baking powder
- 1/2 tsp. ground cinnamon
- 1/4 tsp. salt
- 1/2 cup (1 stick) of butter
- 1/2 cup firmly packed brown sugar
- 1/2 cup granulated sugar
- 1 tsp. Pure Vanilla Extract, 4 Oz.
- 1 egg
- 1/2 cup raisins
- 1/2 cup chopped walnuts
Tools
- Non-Stick Bakeware Large Cookie Sheet
Instructions
Step 1
Preheat the oven to 350°F.
Step 2
In a medium bowl combine oats, flour, baking powder, cinnamon, and salt.
Step 3
In a large bowl, cream butter and sugars with an electric mixer until light and fluffy. Add vanilla and eggs; mix well. Stir in oat mixture; mix well. Stir in walnuts and raisins. Drop by tablespoonfuls or use a cookie scoop onto a cookie sheet 2-inches apart.
Step 4
Bake 10-12 minutes or until light golden brown. Cool on pan on wire rack 5 minutes; remove from pan and cool completely.
Mini Classic Cheesecakes
The perfect mini cheesecake is within reach! With a classic creamy filling and buttery crust, these mini classic cheesecakes are perfect for splitting with a special someone or indulging your sweet tooth. They bake up quickly in 3 mini springform pans so you can have dessert in no time. Add your favorite topping for the perfect little treat.
AMOUNT
3
Ingredients
Crust
- 1 cup graham cracker crumbs
- 2 tablespoons granulated sugar
- 1/4 teaspoon salt
- 5 tablespoons melted butter
Filling
- 1 1/2 package softened cream cheese (12 ounces)
- 1/3 granulated sugar
- 1 teaspoon vanilla extract
- 2 tablespoons cornstarch
- 2 eggs
- 1/2 cup sour cream
Tools
- 3 4-inch mini springform pans
Instructions
Step 1
Preheat the oven to 325°F. Prepare Mini Springform Pans with vegetable pan spray.
Step 2
In a medium bowl, stir together graham cracker crumbs, sugar, salt, and butter until evenly moistened. Press the mixture into the bottom of each pan. Bake for 6-8 minutes or until lightly browned. Remove to cooling grid. Cool completely.
Step 3
In a large bowl, beat cream cheese and sugar with an electric mixer until light and fluffy. Add vanilla and cornstarch; beat until combined. Add eggs one at a time; beat well after each addition. Add sour cream; beat until smooth. Divide the mixture among three pans.
Step 4
Bake for 25-30 minutes or until cheesecake jiggles slightly in the middle when shaken. Remove to cooling grid and cool completely. Refrigerate for 2-4 hours or until completely chilled.
Easy Homemade Lemon Bars
Lemon-lovers rejoice! The best lemon bar recipe is finally here. It’s a homemade dessert that’s easy to make and sure to impress. It has just the right amount of sweet and tart lemon filling and a delicious buttery crust.
After they bake and cool, dust them with powdered sugar and serve.
AMOUNT
24 lemon bars
Ingredients
Shortbread Crust
- 2 cups all-purpose flour
- 1/2 cup powdered sugar (confectioners’ sugar) plus additional for dusting
- 1/2 teaspoon salt
- 1 cup (2 sticks) unsalted butter, melted
Lemon Layer
- 2 cups granulated sugar
- 1/2 cup all-purpose flour
- 5 eggs
- 3 egg yolks
- 1 cup lemon juice (from about 8 lemons)
- 1 tablespoon lemon zest (from 2 lemons)
Tools
- 13 in. x 9 in. baking sheet
- Vegetable pan spray
- Mixing bowls
- Cooling rack
Instructions
Step 1
Make the crust. Preheat the oven to 350ºF. Prepare 13 in. x 9 in. pan with vegetable pan spray.
Step 2 In a large bowl, stir together flour, powdered sugar, and salt.
Step 3
Add butter to the mixture and stir to form a soft dough. Then press into the bottom of the pan and freeze for 15 minutes.
Step 4
Bake for 22-25 minutes or until the edges are golden brown.
Step 5
Making filling. While the crust is baking, whisk together granulated sugar and flour in a medium bowl.
Step 6
Add eggs, egg yolks, lemon juice, and zest and whisk until smooth.
Step 7
Pour the mixture over the hot crust and return to the oven and bake for 18-20 minutes or until the center is set. Cool completely in the pan on a cooling rack.
Step 8
Dust-cooled bars with additional powdered sugar. Enjoy!
Apple Hand Pies
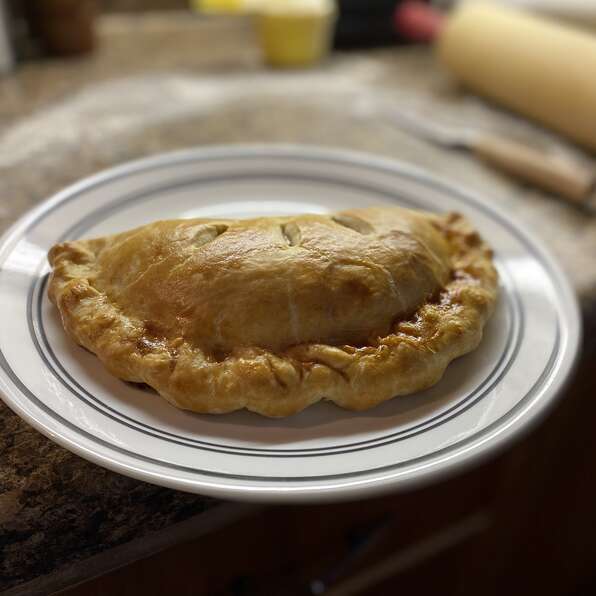
These apple hand pies, also known as apple turnovers, look too perfect to be homemade! Any of your favorite pie fillings, both sweet and savory, will work. I hope you give this easy technique a try soon.
AMOUNT:
4 hand pies
Ingredients
- 2 tablespoons butter
- 2 large green apples – peeled, cored, and cut into chunks
- 2 tablespoons brown sugar
- ¼ cup white sugar
- ¼ teaspoon salt
- 1 ½ teaspoon ground cinnamon, or to taste
- 1 teaspoon water, or more if needed (Optional)
- 1 pound prepared pie dough, cut into 4 pieces
- 1 egg
- 2 teaspoons milk
- 1 teaspoon white sugar, or as needed
Instructions
Step 1
Melt butter in a large skillet over medium heat; let the butter brown to a light golden color and smell toasted for about 1 minute. Stir apples into hot butter; sprinkle with 1/4 cup white sugar, brown sugar, and salt. Cook and stir the apple mixture until the apples are softened about 5 minutes. Mix in cinnamon and water; continue cooking until apples are soft and sticky, 1 to 2 more minutes. Spread apple filling onto a plate to cool.
Step 2
Preheat the oven to 400 degrees F (200 degrees C). Line a baking sheet with a silicone mat or parchment paper.
Step 3
Form a dough piece into a ball, place it on a floured work surface, and roll it into a circle about 8 inches in diameter. Spoon 1/3 to 1/2 cup of apple filling in the center. Fold dough over filling, leaving about 1 inch of dough on the bottom side visible below the top side. Gently press dough closed around the filling, using your fingertips.
Step 4
Fold the overhanging bottom part of dough up over the top edge, working your way around the crust, and pinch the overhang tightly to the top part of the crust.
Step 5
Crimp the edge tightly closed, pinching a little bit of dough with the thumb and forefinger of one hand and using your index finger, on the other hand, to push a small notch into the pinched dough. Continue pinching and notching all the way around until the crust is tightly crimped together. Repeat with remaining dough and filling. Transfer pies onto a prepared baking sheet.
Step 6
Whisk egg with milk in a small bowl until thoroughly combined. Brush the top of each hand pie with egg mixture and sprinkle with about 1/4 teaspoon white sugar. Cut 3 small vent holes in the top of each pie.
Step 7
Bake in the preheated oven until pies are golden brown and filling is bubbling, 25 to 30 minutes. Let cool for at least 15 minutes before serving.
Cheesecake in a Jar
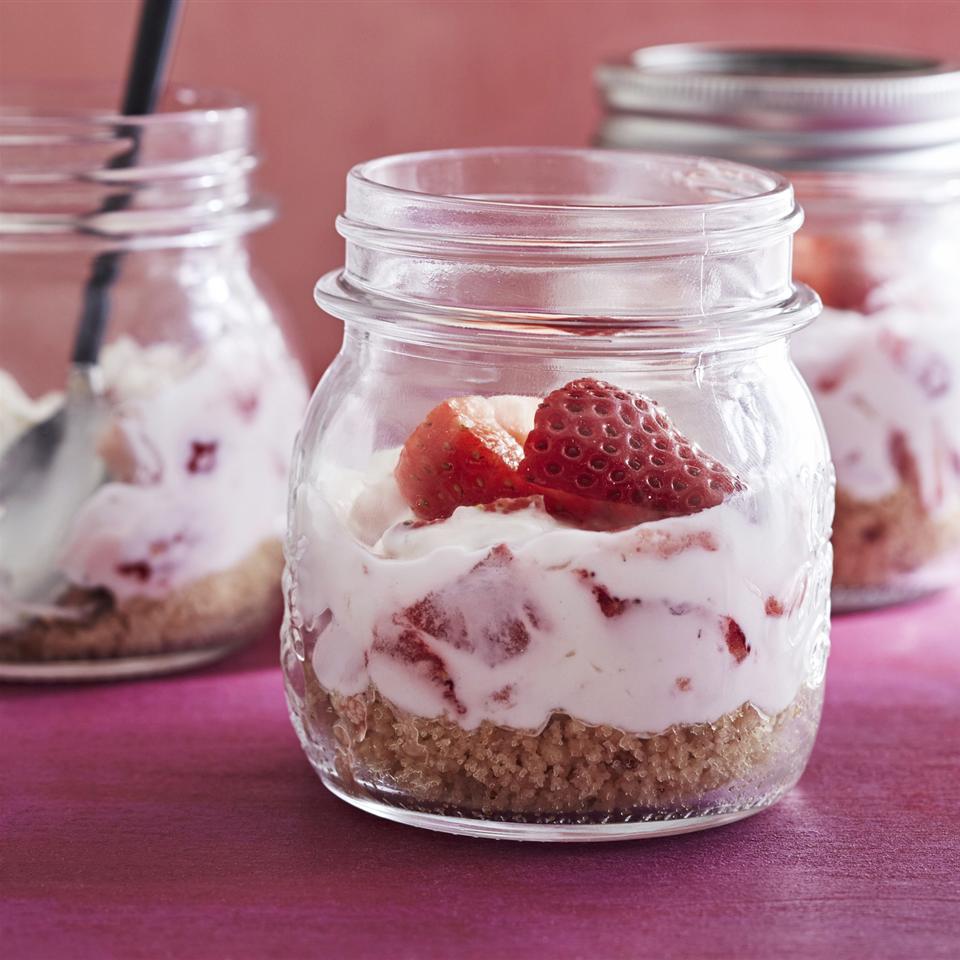
Perfect for summer picnics, this is a no-bake version of cheesecake in a portable jar with fresh strawberries.
AMOUNT:
6 jars
Ingredients
- 6 pecan shortbread cookies (such as Keebler® Sandies), finely crushed
- 2 tablespoons butter, melted
- 2 tablespoons white sugar
- 6 (1/2 pint) canning jars with lids
- 12 ounces sliced fresh strawberries
- 1 (8 ounces) package of cream cheese, softened
- 2 tablespoons fresh lemon juice
- ½ cup white sugar
- ½ cup heavy cream, whipped
Instructions
Step 1
Stir together cookie crumbs, butter, and 2 tablespoons of sugar in a bowl until blended. Divide mixture evenly among jars (about 3 1/2 tablespoons each) and gently press (do not pack) into bottoms.
Step 2
Halve 6 strawberries for garnish, and set aside. Chop the remaining strawberries.
Step 3
Beat together cream cheese, lemon juice, and 1/2 cup sugar in a bowl with an electric mixer at medium speed until smooth. Fold in whipped cream and chopped berries, and divide evenly among jars (about 1/2 cup each). Top each with a 2 berry half and cover with lids. Chill for at least 2 hours and up to 3 days.
Peanut Butter and Jelly Cupcakes
PB&J sandwiches are every child’s favorite lunchtime choice. This nostalgic sweet treat will definitely steal the spotlight at your next party. Pair cupcakes with a cold glass of milk and enjoy!
AMOUNT
About 24 cupcakes
Ingredients
- Cupcakes
- 1 box (16.5 oz) Favorite Yellow Cake Mix
- 3 eggs
- 1 cup water
- 1/3 cup creamy peanut butter
- 3/4 cup grape jelly, divided
- Peanut Butter Buttercream Icing
- 1/3 cup solid vegetable shortening
- 1/2 cup butter, softened
- 3/4 cup peanut butter
- 1 teaspoon Pure Vanilla Extract, 4 Oz.
- 4 cups sifted confectioners’ sugar
- 1/4 cup milk
Tools
- Standard muffin pan
- ColorCups Bright Polka Dots Cupcake Liners
- large bowl
- Scoop-it Measuring Cups
- Scoop-it Measuring Spoons
- Toothpick
- Open Star Cake Decorating Tip 21
Instructions
Step 1 Cupcakes
Preheat the oven to 350°F. Line muffin pan with baking cups.
Step 2
In a large bowl, beat the yellow cake mix, eggs, water, and peanut butter with an electric mixer at a low speed for 30 seconds. Beat at medium speed for 2 minutes. Fill baking cups 2/3 full with batter. Spoon 1 teaspoon of jelly on top of the batter in the center of each cup. Reserve remaining jelly for garnish.
Step 3
Bake 18-20 minutes or until the Cake Tester or toothpick inserted in the center of a cupcake comes out clean. Cool cupcakes in a pan on a cooling grid for 5 minutes. Remove from pan; cool completely.
Step 4 Icing
In a large bowl, beat shortening and butter with an electric mixer until creamy. Add peanut butter, and vanilla. Gradually add sugar, one cup at a time, beating well at medium speed. Scrape sides and bottom of bowl often. When all sugar has been mixed in, icing will appear dry. Add milk, a tablespoon at a time, and beat at medium speed until light and fluffy.
Makes about 3 cups of icing.
Step 5
To Assemble: Ice cupcakes with Peanut Butter Buttercream Icing; if desired, decorate with tip 21 swirls. In a microwave-safe bowl, microwave the remaining jelly on High for 10-15 seconds; stir until smooth. Drizzle over cupcakes and sprinkle with peanuts.
Fruit Brownie Kabobs Recipe
Deliver dessert in an all-new way. Create kabobs with brownies and fruit drizzled with chocolate – yum!
Ingredients
- Pre-made Brownies, cut into squares
- Blueberries
- Strawberries
- Marshmallows, large
- Wooden skewers
Instructions
Step 1
First, layer your skewer with the brownie square, blueberries, strawberries, brownies, blueberries, and marshmallows.
Step 2
Then, repeat, if you have space.
Step 3
Serve for dessert.
Fruity Brownie Dessert Pizza
This Fruity Brownie Dessert Pizza comes together quickly with a boxed brownie mix and a fruity cream cheese frosting. Top off with a dollop of whipped cream and you have the easiest dessert ever!
It is very simple! To that, you’ll add your favorite fruits and berries (strawberries, banana slices, blueberries, etc.) and a dollop of whipped cream.
It’s sweet, tangy, and perfectly balanced on the line between light and over-indulgent.
Check out 17 more cool recipes here!


